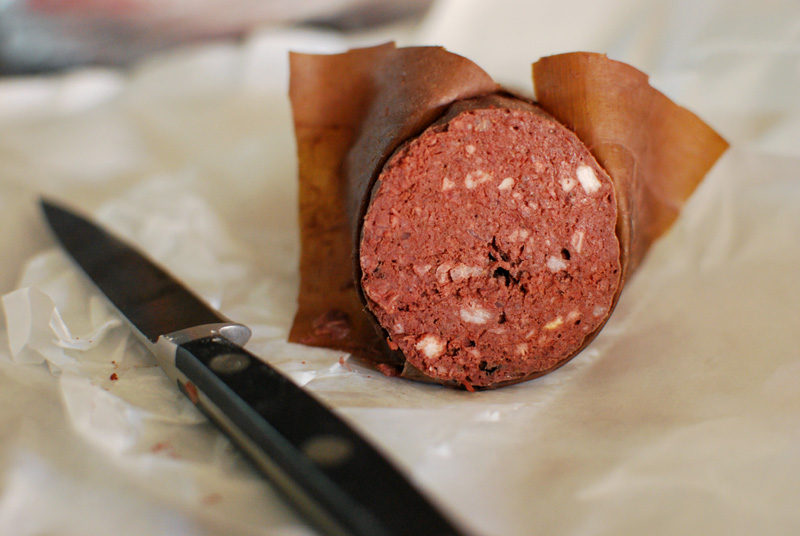
For brunch yesterday: a fritatta with leftover blood sausage, potatoes, scallions, and ricotta. I added a bit of rosemary too, to liven it up a little.
Author: Beth
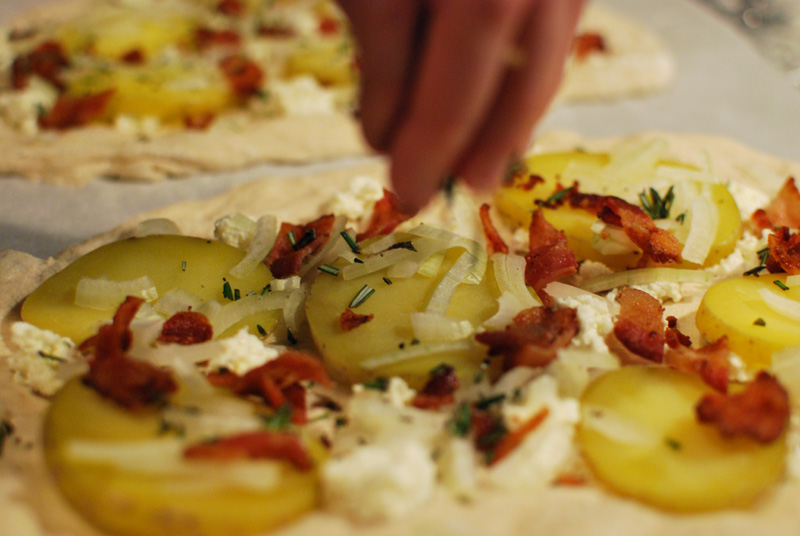
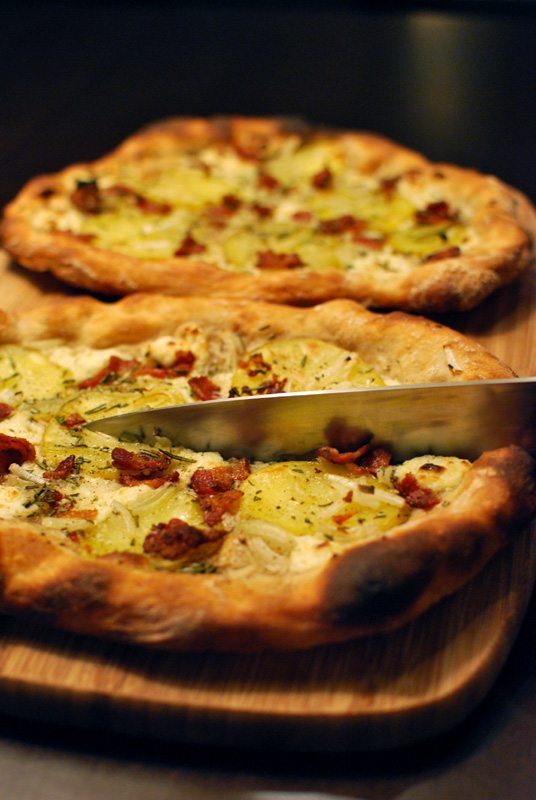
Homemade Ricotta and Potato Pizza
When I was buying the groceries for my recent Irish fry-up, I bought two yellow potatoes (the ones used for the chips). Considering that we only made it through half of one potato for that breakfast, you might say I over-purchased.
But for me, it’s always good to have spare vegetables around the house. They inspire me to create new dishes, to find novel and interesting ways to use them up. Often, I’ll combine three or four recipes based around one food, and serve up something unusual and delicious that I will most likely never be able to serve again – because I can’t remember what the heck I did to make it. It’s very sad when that happens.
So there I was, with one spare potato. Not wanting to resort to the default (though delicious) “roasting with olive oil”, I searched for a more creative use. For four days, the lonely thing sat on the counter, peering up at me with its many eyes, acting wistful. I’m sure I heard it sigh. And let me tell you, a sighing potato is a particularly melancholy thing.
Mercifully, a link in a recent Saveur newsletter provided the answer I was looking for: potato pizza. Of course! That potato would be quite lovely, sliced thinly, atop a long-risen dough, paired with shavings of onion, a light sprinkling of rosemary, and a bit of bacon (also left over from the fry-up). I couldn’t imagine a better use for it. As an added bonus, I had every ingredient I needed already in the kitchen. Win!
But then, I realized that there was no cheese in the refrigerator. Not a scrap. Not even a wasted and dried rind of Parmesan. And while there are some pizzas that can manage to hold their heads high even with a lack of cheese, a potato pizza simply isn’t one of them. Refusing to make a special trip to the store for one item, I decided to make some ricotta, my unquestionably favorite cheese for pizza.
Though it might seem fussy to make your own cheese, especially an easily-purchased one like ricotta, let me assure you that it’s one of the simpler things you can do in the kitchen, and will invariably produce far better cheese than the cottony, grainy stuff found in most grocery stores. If you can make tea, you can make enviable ricotta.
The process is super-easy, and is one of those gleeful instances where a microwave will do a better job than a stove top, as there’s none of that cooked-on milk goo to scrape off a pan afterwards. Put milk, salt, and acid in a glass bowl, heat to 165º F, stir, and strain. Done.
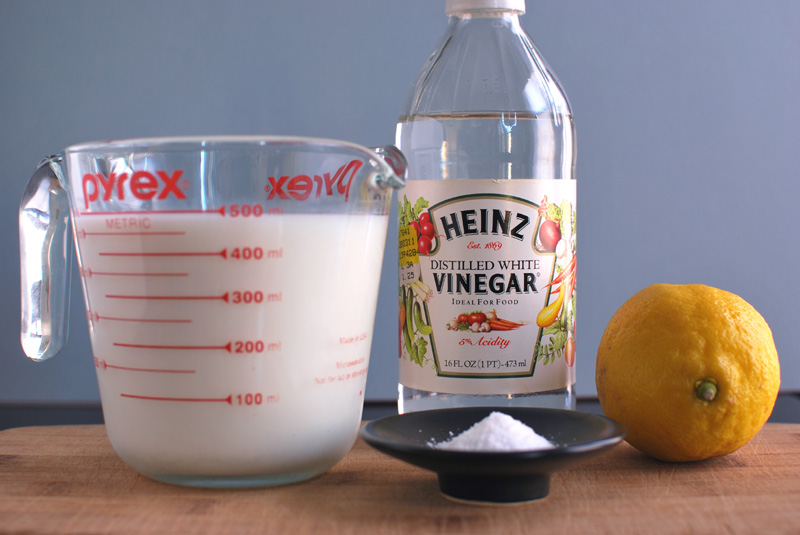
For the acid, I used mostly white vinegar for consistency in acidity, but added a touch of lemon juice for a brighter flavor. You can use all vinegar, or all lemon juice, however you prefer. The flavor was creamy and just barely citrusy, and was simply gorgeous on the pizza. And I made darn sure to write down exactly what I did with this recipe; it was too good to forget about.
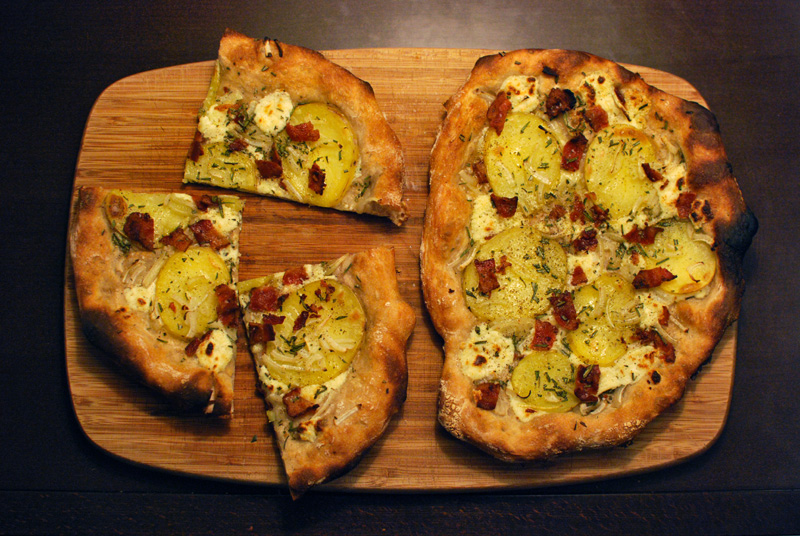
Dotted with circles of potato, mounds of ricotta, and shards of bacon, these pizzas cooked up beautifully, in an oven so hot it actually hurt a little to reach into. The crust bubbled appropriately on the edges, and remained slightly moist on the interior, the hallmark of a well-made Napoli-style pie. I was ecstatic to hear the crust singing in its crackly voice when I pulled it from the heat. But after I cut into the pizza and served it, I was just as happy to hear the silence of content diners, and the only sighings I heard were sighs of contentment from full mouths.
Homemade Ricotta and Potato Pizza
Inspired by Project Foodie
Makes 2 individual pizzas, 2 to 4 servings
You’ll have to plan one day ahead for the pizza dough, but the incredible flavor makes it well worth the wait. Start this recipe 1 hour before the pizza dough is ready, for the ideal timing. The dough will have rested for 1 hour already; that hour would be the perfect time to make the ricotta, and still have a minute to fix yourself a drink.
1/2 recipe No-Knead Pizza Dough (recipe below)
1 recipe Simple Ricotta (recipe below)
1 medium waxy potato (such as Yukon Gold), about 8 ounces
3 slices bacon
1/2 small yellow onion (halved lengthwise)
2 tablespoons fresh rosemary, minced
Olive oil for drizzling (optional)
1. One hour before baking, preheat the oven to 550º F, or as hot as the oven will allow. If using a baking stone, heat along with the oven. Otherwise, position a rack at the lowest possible setting, and heat a large, sturdy baking sheet along with the oven.
2. While the oven heats, bring a medium pot of water to a boil. Slice the potato crossways into 1/4 inch thick slices. Salt the water liberally (about 1 tablespoon), and add the potato slices. Bring back to a boil, and cook for 5 to 7 minutes, or until the slices are softened, but not fully cooked. Drain and let cool.
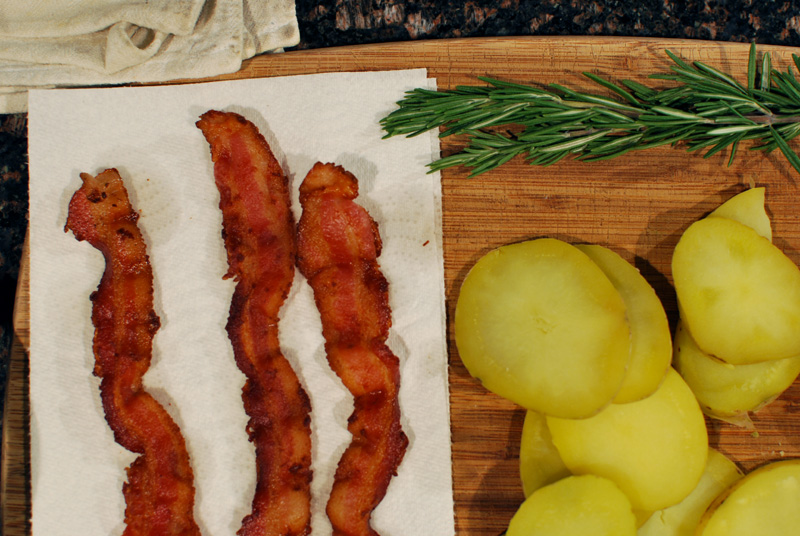
3. While the potato cools, cook the bacon in a pan over medium heat until just browned, but not quite crisp (it will finish cooking in the oven, on the pizza). Drain on paper towels, and let cool slightly. Chop into small pieces, and set aside.
4. Cut the onion-half crossways into as thin slices as possible, and set aside. Mince the rosemary, and set aside.
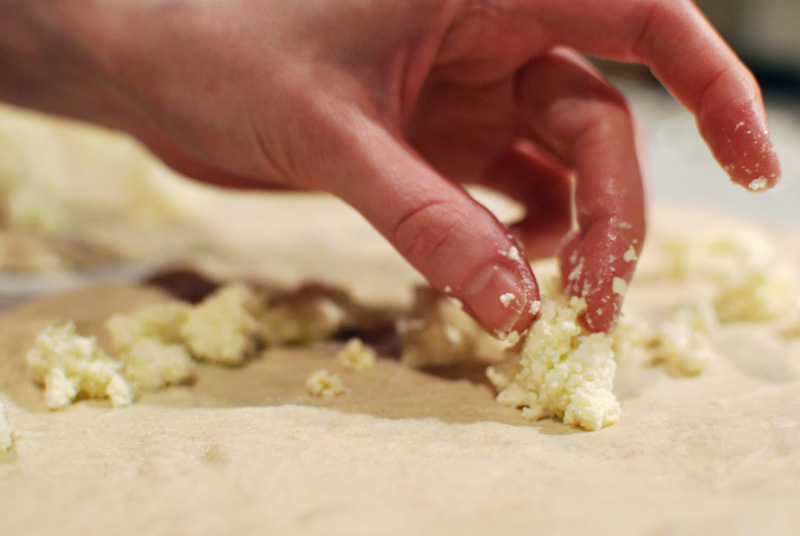
5. When the dough is fully rested, shape it on a sheet of parchment paper with floured hands into the desired shape and size. Top with the ricotta, potatoes, onion, bacon, and rosemary, not necessarily in that order. Salt and pepper to taste, and drizzle lightly with olive oil. Quickly transfer the pizza (still on the parchment) to the hot baking stone or sheet pan.
6. Bake at 550º F for about 10 minutes, or until the crust is browned. Let cool slightly before cutting and serving. Cooked pizza may be refrigerated for up to 1 day, or frozen for up to several weeks. Re-crisp in a 350º F oven until warm.
No-Knead Pizza Dough
Adapted from Jim Lahey
Makes 4 individual pizzas
This recipe uses just enough whole wheat flour to provide a slightly rustic nature and sweet flavor, without compromising the coveted gluteny pull and tear that an all-white-flour crust brings. It requires advance planning, but there’s little effort involved, and the results are well worth the time invested.
11 1/4 ounces (about 2 1/2 cups) unbleached all-purpose or bread flour, plus extra for dusting
3 ounces (about 2/3 cup) whole wheat flour
1/4 teaspoon instant yeast (not active-dry)
1 1/2 teaspoons salt
1 1/2 cups water
1. In a large bowl, whisk the flours together with the yeast and salt. Add the water and stir until blended (the dough will be very sticky). Cover the bowl with plastic wrap and let rest for 12 to 24 hours in a warm spot, about 70º F, or until very risen and bubbly.
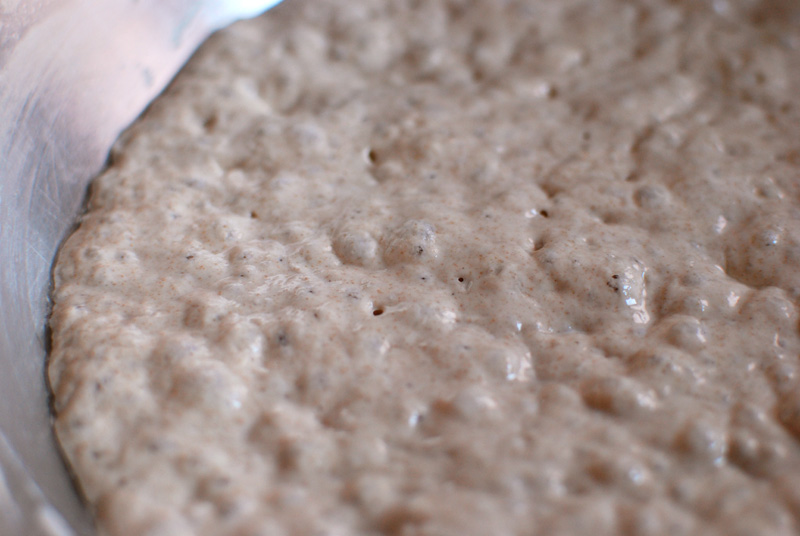
2. Turn the dough out on a well-floured work surface. Lightly sprinkle the top with flour, and fold the dough over on itself once or twice. Cover loosely with plastic wrap and let rest for 15 minutes.
3. Divide the dough into 4 equal pieces and shape each piece into a rough ball. (At this point, the dough may be wrapped tightly in plastic, or in a plastic zip-top bag, and frozen. Thaw overnight in the refrigerator before proceeding.) Dust the dough with flour, and cover loosely with plastic wrap. Let rest for 2 hours; the dough may or may not double in size. Proceed as directed in above recipe, or following your own.
Simple Ricotta
Adapted from Serious Eats
Makes about 1 1/2 cups
Though this isn’t a “true” ricotta (as it’s made from milk, not whey), it’s certainly a convincing substitution. It’s still worlds better than most store-bought ricottas out there, and is ridiculously easy to make. You can use any type of milk for this, from skim all the way to cream; but be aware that skim milk will make a more rubbery end product, while cream will make an incredibly over-the-top rich cheese. I used 2%, as that’s what I keep in the house, but would probably try whole milk next time, or even 2% with a bit of cream added to it, for a more luxurious texture. The recipe may easily be scaled up or down; for me, this is the minimum amount of ricotta I want after going through the effort to make it.
6 cups milk
3/4 teaspoon salt
2 tablespoons lemon juice
1/4 cup distilled white vinegar
1. Line a mesh strainer with 2 layers of paper towels. Set over a bowl to drain the cheese later. Combine milk, salt, lemon juice, and vinegar in large microwave-safe glass bowl, or other container. Microwave on high heat until lightly bubbling around edges, 8 to 12 minutes depending on microwave (milk should register about 165° F on an instant-read thermometer).
2. Carefully remove from the microwave, and stir gently for 5 seconds. The milk should separate into solid white curds and translucent liquid whey. If not, microwave until fully separated, in 30 second increments.
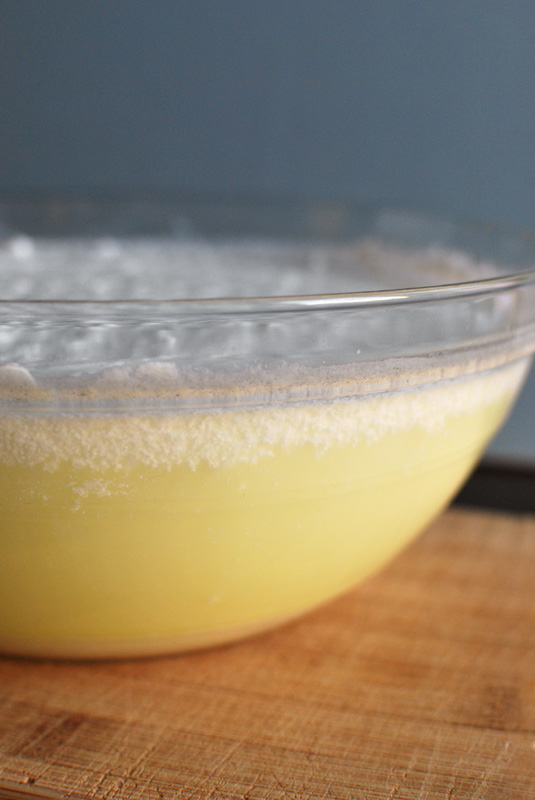
3. Using a wire skimmer or slotted spoon, transfer all floating curds to the prepared strainer. Do not be tempted to pour the whole mixture into the strainer; the fine curds that have sunk to the bottom will clog the paper towels and impede draining.
4. Cover loosely with plastic wrap, and allow to drain until desired texture is reached, about 5 minutes for very moist ricotta, or about 30 minutes for a firm ricotta. Store in an airtight container in the refrigerator for up to 5 days.
Five Minute Photo Shoot: Glazed Mushrooms with Brown Rice
A Proper Irish Fry-Up
When I was in design school, I was lucky enough to spend a semester studying in and traveling around Ireland. Eleven of us traipsed the whole of the isle, from Dublin to Sligo, from Cork to Belfast, and many places in between. Each town of course had its own unique charms: Ballyvaughn, which had no bank, but three pubs; the blur of Dublin on a Sunday morning over the singular hue and smell of the Liffey; the omnipresent security towers and cameras in Derry (or Londonderry, depending on whose side you’re on), eyeless and unsettling.
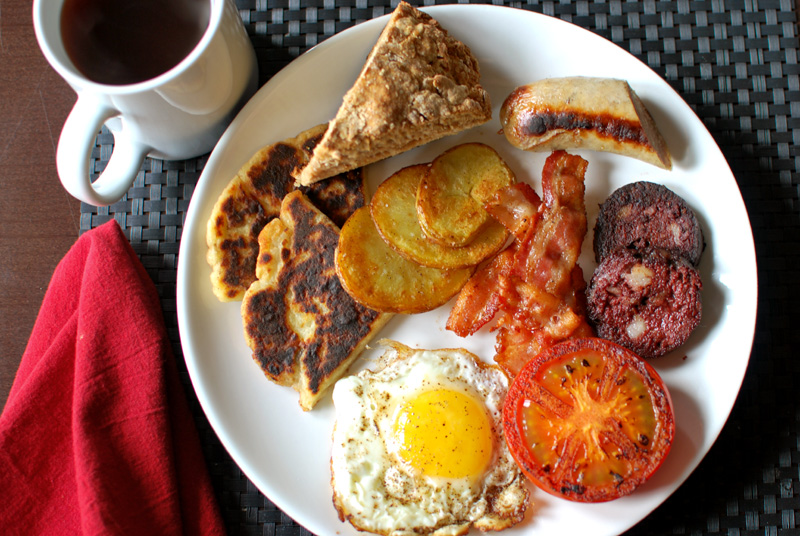
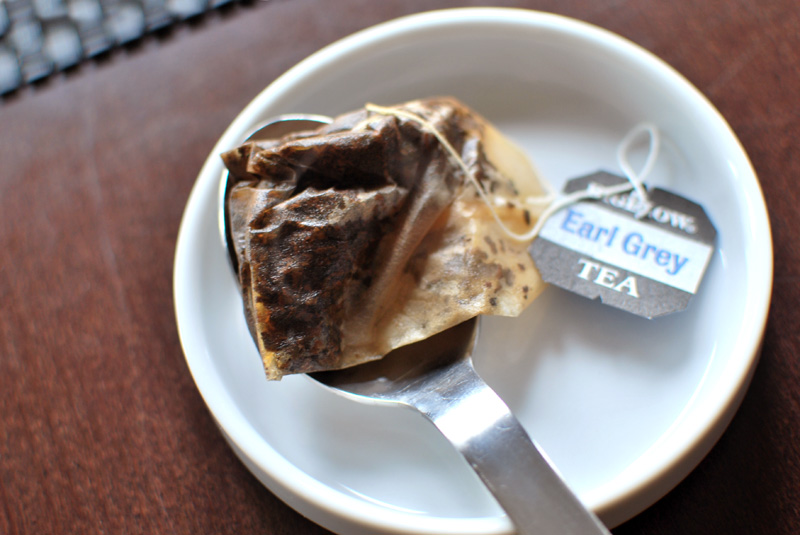
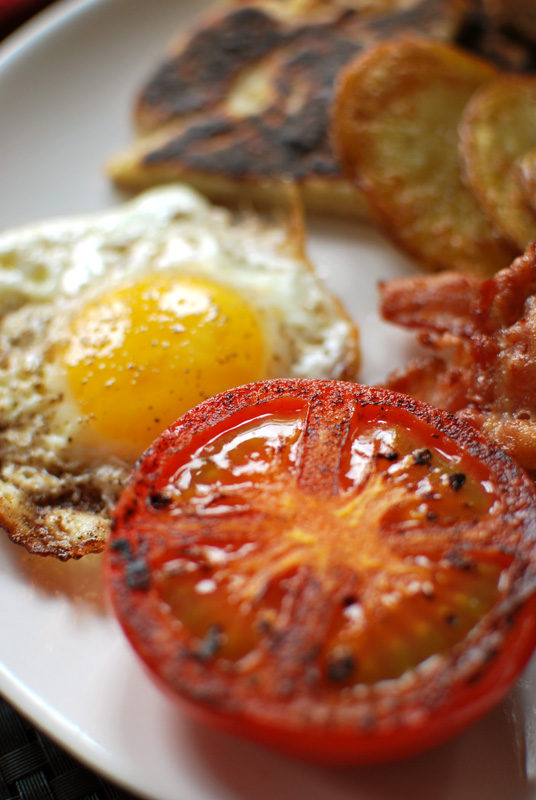
But throughout the whole country, there were two constants: the drizzle that rarely let up (and just as rarely grew any harsher), and the breakfasts. In every pub, in every bed and breakfast, the breakfasts were unflaggingly similar. Each morning brought eggs (usually fried), sausage, bacon, soda bread, potato farls, potatoes in at least one other form, and often a tomato, all washed down with tea, never coffee.
It didn’t take long for us Americans to realize that this was the traditional Full Irish Breakfast; and for college students from Alabama, where liquor stores are closed on Sunday by law, it was the ideal antidote to evenings spent thoroughly investigating Ireland’s pub culture. We investigated the heck out of it.
Now, I know that as it’s St. Patrick’s Day, I’m supposed to talk about Guinness, or corned beef and cabbage, or beef and Guinness stew, or chocolate and Guinness everything, or (God help us) green eggs and ham. But those sorts of dishes never seemed particularly fitting to me. Certainly, the Irish drink their share of Guinness, but lager takes the lion’s share of sales in the nation. And while beef and Guinness stew is indeed a pub staple, so is the more British fish and chips.
But when I remember Irish food, I recall those hearty, meat-laden, oh-I-could-never-eat-all-this (but then you do) plates; those to me seem a far more suitable tribute. And if you, like me, live in a city that loves to celebrate St. Patrick’s Day so much that they dye the friggin’ river green, then you’ll appreciate the chance to wash away the previous night’s celebration in such a traditional manner.
Irish Fry-Up
This menu is intended for American tables, so please forgive me for not getting into the subtleties between streaky bacon and proper rashers, and the correct sort of tea to have. Besides, it’s just breakfast.
Soda bread (recipe below)
Potato bread (recipe below)
Roasted potato chips (recipe below)
Bacon, crisped
Sausage, links or patties, browned
Blood sausage (a.k.a. black pudding), browned
Eggs, fried or scrambled
Tomato, halved and griddled
Breakfast tea of choice
The key to this meal is timing, and there is no specific method for cooking each individual item, as it depends on what exactly you’ve purchased. The items are listed above in the order they should be cooked in; this video will provide more specific advice for timing. The bacon is cooked first here, so that you may use the delicious rendered fat to cook the remaining ingredients, if desired. There’s nothing like eggs fried in bacon fat.
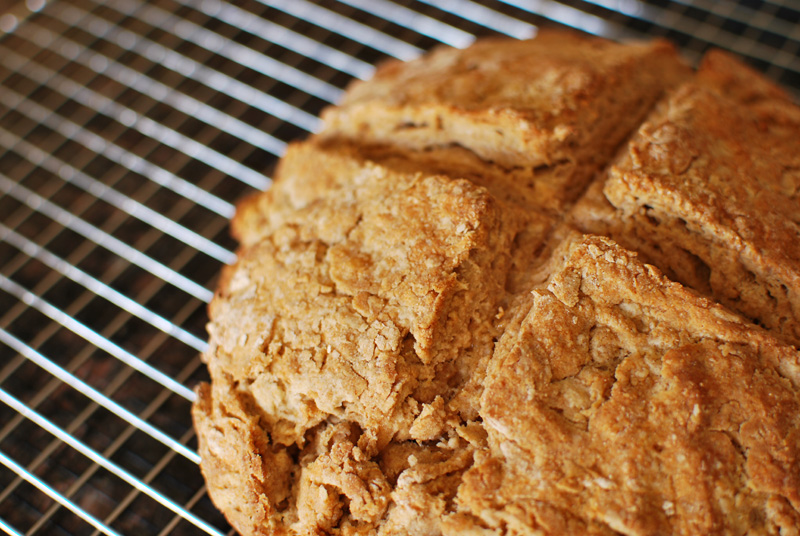
Soda Bread
Adapted from Ballinalacken Castle Country House & Restaurant
Makes one 9 inch loaf
This version is slightly dense, but pleasantly so, with a moderate sweetness and a crunchy crust.
6 3/4 ounces (1 1/2 cups) unbleached all-purpose flour
6 3/4 ounces (1 1/2 cups) whole wheat flour
1/4 cup packed brown sugar
3/4 teaspoon baking soda
1/2 teaspoon salt
3 tablespoons cold unsalted butter, cut into very small pieces
1 cup cold buttermilk, well shaken
1. Preheat the oven to 425º F. Line a baking sheet with parchment paper, or lightly grease it.
2. In a large bowl, whisk together the flours, sugar, baking soda, and salt. Add the cold butter, and toss to coat it. Using fingertips or a pastry cutter, quickly cut the butter into the flour, until only small lumps remain. Do not over-handle, as the butter should not be allowed to warm up.
3. Add the buttermilk, and fold together gently and quickly, until a rough dough forms. Turn out onto a work surface and lightly knead until the dough comes together, no more than 10 turns. Transfer the dough to the prepared baking sheet, and shape into a rough circle about 9 inches in diameter. Cut a shallow “X” shape in the top. Do not cut all the way through the dough.
4. Bake at 425º F for 35 to 40 minutes, or until golden brown and cooked through. Transfer to a wire rack to cool before slicing.
Potato Bread
Adapted from Wikibooks
Makes three 6 or 7 inch breads
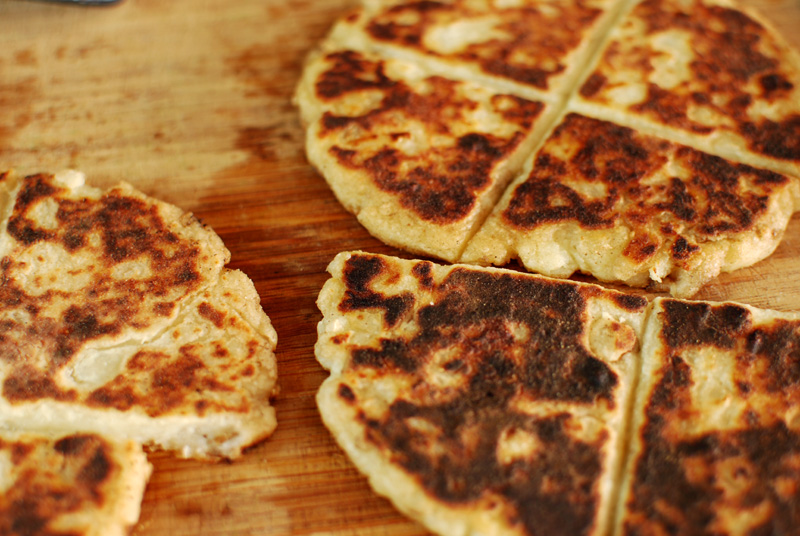
This filling and delicious bread originated as a way to stretch expensive wheat flour, while using the plentifully abundant potato. Each bread is divided into quarters, or farls, with a crunchy exterior, soft interior, and a load of buttery flavor. For the mashed potato that goes into the dough, I’ve left the skin on, as I don’t see the point in throwing away nutrients, though it’s more traditional to remove the skin. Removing the skin will also produce a more pristine-looking farl, but I like the rustic look of the occasional peel peeking out the side. If making ahead, these can be kept warm in a 200º F oven until ready to serve, though they are just as good at room temperature.
1 large Idaho potato (about 12 ounces)
3 tablespoons unsalted butter, plus extra for greasing the pan if desired
2 tablespoons cream, or milk
3/4 teaspoon salt
3 ounces (2/3 cup) unbleached all-purpose flour, plus extra for dusting
1. Bring a pot of water to a boil. Meanwhile, chop the potato into pieces approximately 1 to 2 inches in size. Add to the water, and boil the potato for 18 to 20 minutes, or until very soft when pierced with a knife, and almost falling apart.
2. Drain the potato. In a medium bowl, mash until no large chunks remain. Cut the butter into pieces, and add into the warm potato. Add the cream and salt, and stir until combined. Let cool briefly.
3. Incorporate the flour, a little at a time, into the potato mixture until a pliant dough forms. You may need less or more than the whole 3 ounces. Take care to not overwork the dough. Turn out onto a lightly-floured surface, and knead briefly until smooth.
4. Divide the dough into 3 equal pieces, and shape into round discs. Dusting with just enough flour to prevent sticking, roll each out to a 6 or 7 inch round. Press a shallow “X” shape into the top of each disc, taking care to not cut all the way through the dough.
5. Heat a flat pan or griddle over medium to medium-high heat. Add a small knob of butter (about 1 teaspoon), if desired. Add one round of dough, and cook on each side until well-browned in spots, 3 to 5 minutes. Remove to a plate, and repeat cooking with remaining dough. Serve warm, or at room temperature.
Roasted Potato Chips
This method produces the most French-fry-like oven potatoes I know of. The interior is airy and soft, and the exterior is crisp and golden. Only use waxy potatoes, such as Yukon Gold or red potatoes; baking potatoes will not produce the desired result.
Yellow or red potato, cut crossways into 1/2 inch slices
Olive oil
Salt
Black pepper
1. Preheat the oven to 425º F.
2. Bring a pot of water to a boil. Add the potato slices, and boil for 7 to 8 minutes. Drain carefully. The potatoes will be slightly soft, but not fully cooked.
3. Gently toss the potatoes with enough olive oil to coat. Sprinkle liberally with salt and pepper. Spread in a single layer on a baking sheet, and transfer to the oven.
4. Roast for about 10 minutes, then flip each potato slice over. Roast for an additional 8 to 12 minutes, or until golden brown. Remove and let cool slightly until ready to serve.
Steak Fried Rice
I love fried rice. It’s so accommodating. Whatever leftovers you happen to have (and I mean anything), it’s an easy matter of cutting things down to size and quickly sautéing them all with some rice. Simple, nutritious, and fridge-cleaning, it could hardly get better.
For this version, I used the leftovers from the steak tacos I made previously. The various vegetables used to garnish the tacos – red onion, scallion, cilantro, bell pepper – were also saved, all jumbled together in a bag. They were already sliced, but a quick chop brought them down to bite-size, which I prefer in fried rice.
A fast and hot turn in a pan with some olive oil charred the edges nicely, and softened the crunch before cold leftover brown rice was added. Letting the rice sit for a minute or so gave some of the rice that wonderfully crisp texture around the edges, though you can skip that if you like. The steak and some chopped scallion tops were added just before removing the pan from the flame, and residual heat warmed the meat perfectly without cooking it further. I added some hot sauce to the pan, mostly on a whim, but also served additional salsa verde, leftover from the tacos, at the table.
I would write a recipe for this, but the nature of the dish is so impromptu and variable that it seems unnecessary. It’s really more about technique than ingredient. All you really need is to have your rice cold (ideally, but even this is not requisite), your vegetables and other add-ins chopped and ready to go, and a hot fire under a pan large enough to really toss things around. Add a touch of oil, then anything that needs to be cooked, then rice, then stir in anything that needs only be warmed. Serve. Easy as pie. Who needs a recipe?
Steak Tacos
For the most part, I cook and eat a vegetarian diet. Not that I’m a vegetarian; far from it. Can you really have a pot of lentils without a little bacon, or red beans without a smoked ham hock? My point exactly. In fact, I think I could actually pick up a whole lamb, gamboling about in a pasture, and just take a bite out of the little guy. Mmm, delicious lamb. It is a great weakness of mine.
Love of lamb notwithstanding, meat is a relatively rare ingredient in my kitchen, and is most often used as an ingredient rather than a main dish, for convenience as well as health. So when I posed the recent question, “What would you like for dinner?”, I expected the usual reply: “Oh, whatever you like will be fine,” which would then free me to concoct some delightful mélange of whatever vegetables struck my fancy at the store. But to my surprise, the request came back: “Meat. Maybe skirt steak.”
Huh.
Um, okay. Meat. Meat it is.
When I eat meat, I want it to be the real deal, especially as meat tends to be a “special occasion” food in my kitchen. A bowl of less-than crisp vegetables I can deal with; but I simply cannot abide dry, tough, overcooked, or poorly-prepared meat. And ideally, I’d like the meat to act much like a shaving of truffles or fine Parmigiano-Reggiano would; that is, a small but hugely-flavorful and indispensable part of the meal, without which the dinner would be greatly diminished.
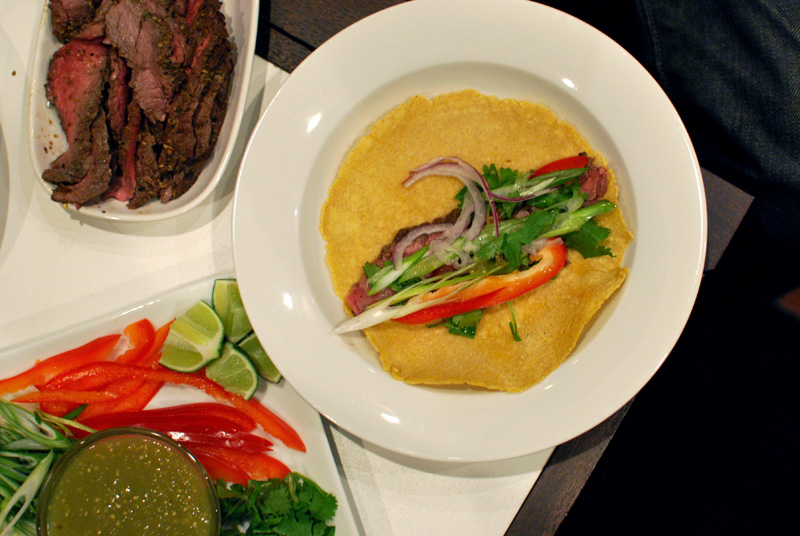
And so, with the promise of a skirt steak to be procured on the way home, I decided that the ideal way to showcase this particular meat was in taco format. As much as I love vegetables, for me, tacos simply require some sort of meat (or fish). A roasted or grilled vegetable taco just isn’t the same, and I firmly believe that beans are too squishy for this application. Those belong on the side, thank you.
Skirt steak lends itself beautifully to the nature of tacos, as it is best when seared quickly and sliced thinly into ribbons of tender and rare meat, ideal for layering in a tortilla with other ingredients. It is also quite flavorful, which means that a little will go a long way, especially when coated with a generous amount of pepper and spices, as I’ve done here.
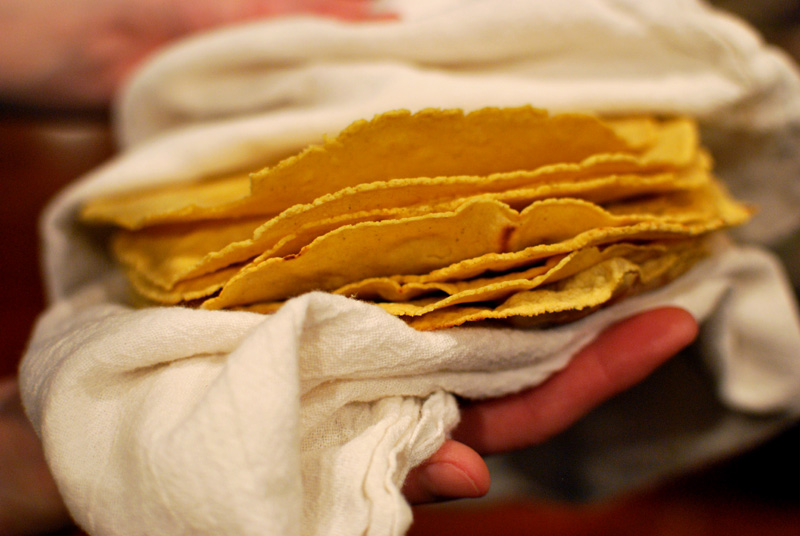
Tacos are one of those fascinating creatures that are far more than the sum of their parts. Corn tortillas are rather bland eaten alone; but pair one with a heavily-spiced meat too bold to eat on its own, and a smattering of fresh vegetables, and you’ll find sweetness, richness, vibrance, and complexity in each bite. Make tortillas yourself, and it’s even better. Pre-made tortillas, both corn and flour, tend to be horribly dry and sawdusty; homemade ones take a little effort, it’s true, but the results don’t compare in the slightest.
Of course I had to make tortillas. If I was going to go to all the trouble of preparing meat, I wasn’t about to skimp on so crucial and simple an ingredient as a tortilla. Besides, after last year’s project, I feel a bit wrong buying a bread that I know is so easy to make.
All said and done, these skirt steak tacos satisfied the both of us; meat was served, as requested, but I got my fill of vegetables, too. As an added bonus, with reasonable portioning, the two of us ate our fill of tacos for two meals, with just enough meat and vegetables left over for some steak fried rice. But, now, I’m getting ahead of myself…
Skirt Steak Tacos
Serves 4
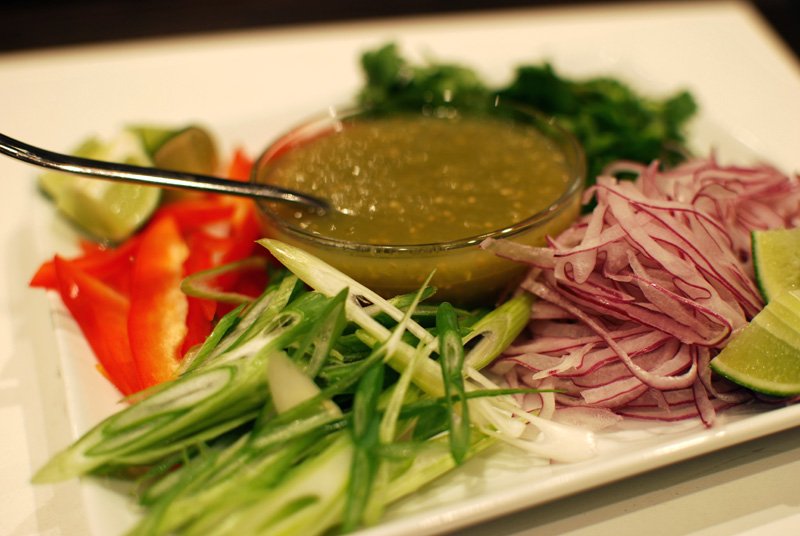
I’ve given suggestions of toppings to put with these tacos, but you should feel free to mix it up however you like. Avocado, however, is highly recommended.
For the steak:
4 cloves garlic
1/4 teaspoon kosher salt
1 1/2 teaspoons whole cumin seed
1 teaspoon Szechuan peppercorns
1 teaspoon whole black peppercorns
1/2 teaspoon dried oregano
1/4 teaspoon cayenne pepper
1 tablespoon olive oil
1 pound skirt steak (more or less)
For serving:
Sliced red onion
Sliced green onion
Sliced bell pepper
Sliced avocado
Cilantro leaves, roughly chopped or torn
Lime wedges
Salsa verde (tomatillo salsa, store-bought)
Corn tortillas (recipe below)
Napa cabbage slaw (recipe below)
1. Roughly chop the garlic. Sprinkle the salt over the top, and crush into a paste by dragging the flat side of a knife over it.
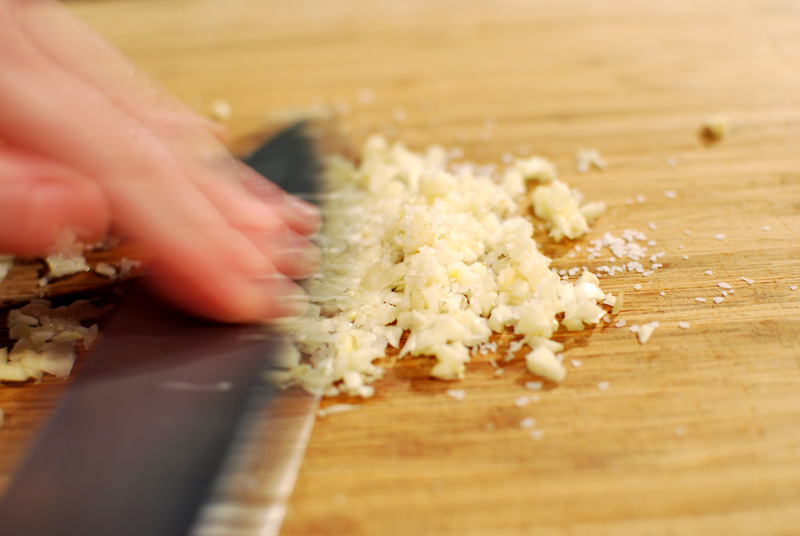
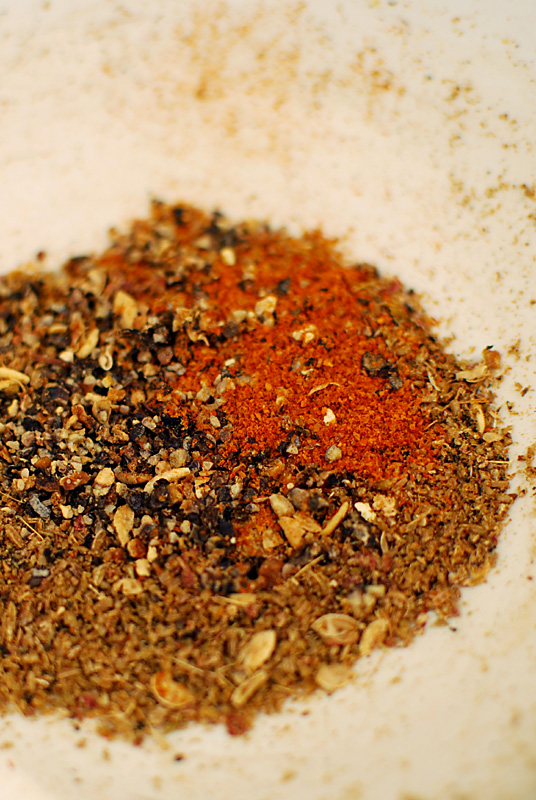
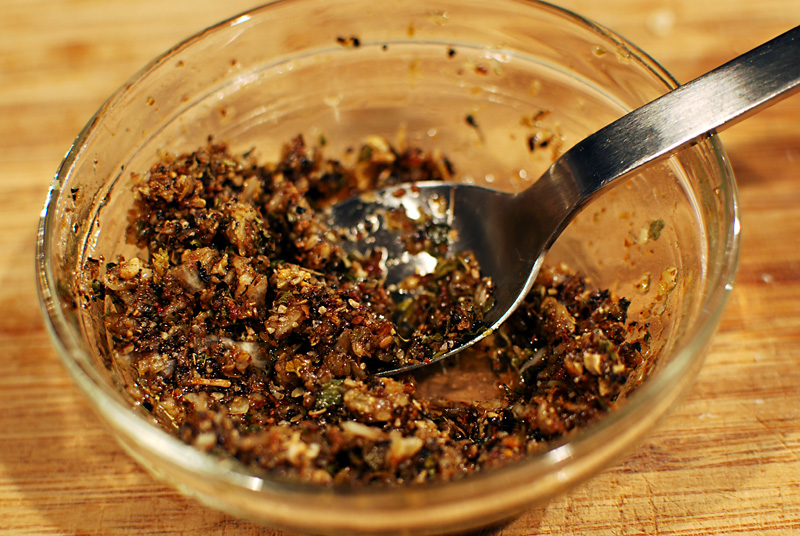
2. In a dry pan over medium heat, toast the cumin, Szechuan peppercorns, and black peppercorns until fragrant, 2 to 3 minutes. Transfer to a mortar or spice grinder, and crush to desired coarseness. Combine in a small bowl with the garlic paste, oregano, cayenne, and olive oil.
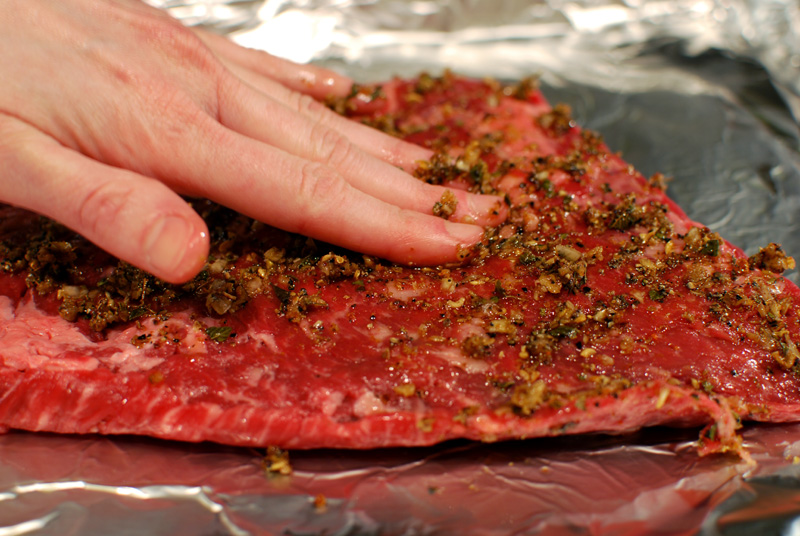
3. Rub the spice paste over the skirt steak, and let stand loosely covered at room temperature for 30 minutes. Meanwhile, preheat the broiler to high, and prepare the remaining ingredients for serving.
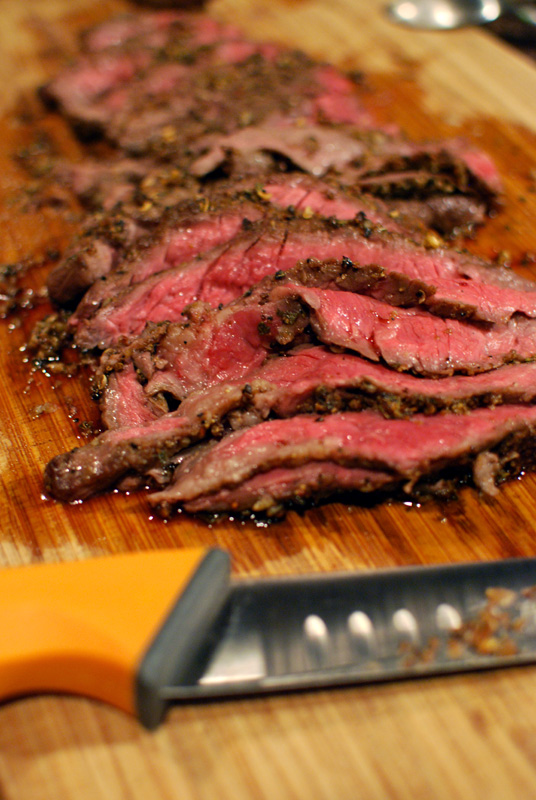
4. Broil the steak 4 to 5 inches from the heat, about 2 minutes per side for rare, depending on thickness (mine was on the thin side). Remove from heat, tent loosely with aluminum foil, and let rest at least 10 full minutes before cutting. Slice across the grain with a sharp knife into as thin slices as possible. Serve with tortillas and other ingredients.
Corn Tortillas
Makes 16
The masa harina (nixtamalized corn flour) needed for tortillas can be found at Latino markets or specialty grocery stores. The package should be labeled as for tortillas or tamales. Regular cornmeal is not a substitute. This dough tends to dry out easily; if this happens, simply knead a little water back into the dough. Over-kneading is not a concern here.
8 1/2 ounces (about 1 3/4 cups) masa harina (not regular cornmeal)
1 cup plus 2 tablespoons warm water
1/4 teaspoon salt
1. Mix the masa harina and water together in a bowl until a rough dough forms. Knead either in the bowl or on a work surface until smooth and soft. You may need to add additional water if the dough is crumbly, or additional masa if the dough is sticky. Return to the bowl, and cover tightly with plastic wrap. Let rest for about 30 minutes.
2. Divide the dough into 16 equal pieces. Roll each piece into a ball, keeping the unused pieces tightly covered. Heat a heavy pan over medium heat.
3. Cut a gallon-sized plastic zip-top bag down two of the sides, leaving only one side attached. Place one ball of dough between the pieces of plastic, and press with a flat surface (such as a cutting board, another pan, or a flat-bottomed plate) until flattened out. With a rolling pin, roll until the dough is as thin as desired, or the disc is 5 or 6 inches across. (If you happen to have a tortilla press, you can certainly use that instead of the plastic bag.)
4. Peel the plastic from the dough. Lay the rolled-out dough in the heated pan. Cook for about 1 minute, then flip over. Cook the other side for about 1 minute more. The tortilla may or may not brown in spots, and should puff up slightly. Adjust the heat as needed if the tortilla is cooking too quickly or too slowly.
5. Transfer the cooked tortilla to a clean kitchen towel (not terry cloth), and cover while cooking the remaining tortillas. When cooked, stack each tortilla on top of the others, and cover with the towel to keep warm. Serve warm, or wrap and freeze. Tortillas will reheat beautifully in a warm oven, wrapped in aluminum foil; or in a microwave, wrapped in wax paper.
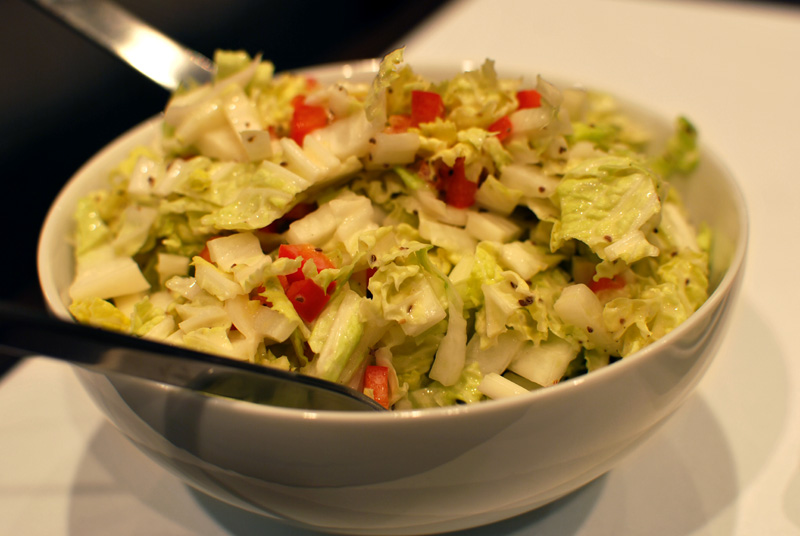
Napa Cabbage Slaw
Makes about 4 servings
If you’d like to make this ahead of time, for serving within a day or so, toss the chopped cabbage with 1 tablespoon salt. Let sit in a colander to drain for 1 to 2 hours. Rinse, and squeeze dry; proceed as directed with the recipe. This salting procedure will draw moisture out of the cabbage, eliminating the watery pool that often forms at the bottom of a bowl of slaw, and will help keep your cabbage crunchy.
1 small head Napa cabbage (about 1 1/2 pounds)
3 tablespoons diced red bell pepper
2 tablespoons plain yogurt
2 tablespoons mayonnaise
1 tablespoon brown rice vinegar
Dash soy sauce
Dash fish sauce
1/2 teaspoon celery seed
Salt and black pepper, to taste
1. Chop the Napa cabbage by slicing the whole head lengthwise several times, not cutting through the stem end that holds it all together. Cut crossways, chopping the cabbage as finely as desired. Dice the bell pepper. Set aside.
2. In a large bowl, whisk together the yogurt, mayonnaise, vinegar, soy sauce, fish sauce, and celery seed. Add the cabbage and bell pepper, tossing to combine. Salt and pepper to taste. Serve immediately.
Roasted Eggplant With Tahini Sauce
Normally, this is where I’d insert photo after photo of lovely ingredients.
Imagine then, the plump aubergine, the cream-colored garlic, the crisp onion. Imagine the anchovies, swimming eerily in olive oil. Imagine the cumin seeds, the sunny lemon, the putty-hued tahini, the jarring red of the tomato.
You’ll have to imagine these things because I was foolish enough to think that this thrown-together mess wouldn’t be worth mentioning. While running an errand yesterday afternoon, I realized that I hadn’t even thought about dinner yet. Not wanting to go out a second time for any ingredients, I quickly scanned my mental inventory of the refrigerator, and remembered the jar of tahini left over from these beauties.
Stopping in at the grocery store, and without really knowing why, I picked up one eggplant and one tomato. Something about the persistent (though lessening) chill in the air suggested something roasted. Eggplant seemed to match the tahini that nagged at me to be used; the tomato would lend freshness and acidity. Somehow.
Back home, I surveyed the refrigerator, pulling out anything that seemed like it would play nice. Out came the tahini. Out came a container of cooked brown rice. Three lonely anchovy fillets in a jar, risking expiration, joined in. There was an onion, chopped and frozen. Cloves of garlic and a naked, previously-zested lemon followed. And then I let them tell me what to do.
The eggplant demanded to be chopped, and roasted with the onion and the garlic. The few anchovies decided that the hot oven was far too much for them to handle, and asked to be melted into some sort of sauce. The tahini insisted on being used raw, with no heat applied, as did the tomato, while the rice politely offered to play a supporting role. From the spice cabinet, cumin seed, dried thyme, and oregano cried out to be used, and I was more than happy to accommodate them.
I knew I couldn’t exactly go wrong with roasted eggplant; but the scents wafting from the pan as the anchovies gently simmered with the cumin, mingling with the sweet smell of the caramelizing onion and eggplant, told me that I had something special on my hands.
But after tasting the finished sauce, the boldness of anchovy mixed with nutty tahini and vibrant lemon, punctuated with the smoke of cumin, and I knew I couldn’t keep this one to myself. With the somehow meaty flavor of the roasted eggplant, over a plate of brown rice, it was the best kind of simple dinner: the one you didn’t expect could possibly taste so incredibly good.
And then, I started kicking myself. Why, oh why, hadn’t I taken even one picture?
(Good thing there were leftovers for lunch today.)
This earthy mixture of roasted vegetables is extremely versatile. Serve it over rice, with a dollop of yogurt and a garnish of parsley, as pictured; serve it tossed with pasta and bits of salty feta; purée it and garnish with mint for a dip to go with toasted pita wedges; use it as is for a flavorful side dish with simply-prepared pork, fish, or chicken.
Ingredients
- 1 eggplant, cut into 1 inch cubes
- 1 medium onion, diced (about 1 cup)
- 5 cloves garlic, roughly chopped
- 2 to 3 tablespoons olive oil
- 1/2 teaspoon dried thyme
- 1/2 teaspoon dried oregano
- 1/4 teaspoon cayenne pepper
- 1 bay leaf
- Salt and black pepper, to taste
- 3 olive oil-packed anchovy fillets, with 1 tablespoon of the oil
- 1/2 teaspoon whole cumin
- 2 tablespoons well-stirred tahini
- 2 tablespoons fresh lemon juice
- Salt and black pepper (optional)
- 1 medium tomato, diced
Instructions
1. Preheat the oven to 450º F. While the oven heats, prepare the vegetables.
2. Toss the eggplant, onion, and garlic together in a large roasting pan. Add 2 tablespoons of the olive oil, and toss to combine at once, before the eggplant soaks up the oil. Add the remaining tablespoon oil if the mixture looks very dry; do not be tempted to add any more than that, however. Add the thyme, oregano, cayenne, and bay leaf. Salt and pepper to taste, and toss until incorporated.
3. Roast the mixture at 450º F for 30 to 40 minutes, or until well-browned and very soft. Set aside to cool slightly.
4. While the vegetables cool, make the sauce. Heat the anchovies in their oil in a small pan over medium heat. When they begin to sizzle and break down, add the cumin and reduce the heat to low. Let cook until the cumin is fragrant, 2 to 3 minutes. Remove from the heat, and add the tahini. Stir until smooth, then stir in the lemon juice. Taste, and add salt and pepper if needed.
5. Pour the sauce over the roasted eggplant. Add the diced raw tomato, and toss. Serve warm, or at room temperature.
https://onehundredeggs.com/roasted-eggplant-with-tahini-sauce/Five Minute Photo Shoot: Scrambled Eggs and Scallion Pancake
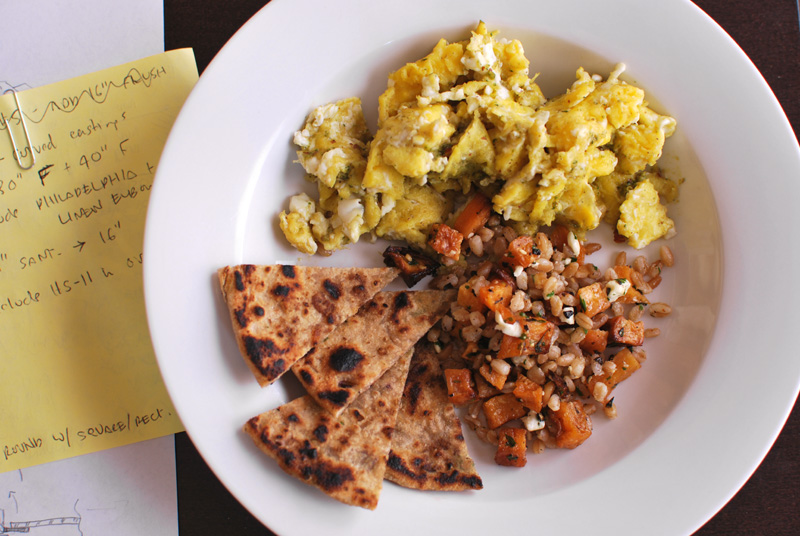
For a boyfriend-working-from-home lunch today: eggs scrambled with pesto, wedges of homemade scallion pancake, and leftovers (lovely farro, feta, and roasted rutabaga) from dinner last night.
Man, I sure do eat a lot of eggs for lunch. I need to be more creative. Or maybe do some advance planning, instead of waiting until I’m ready to chew my arm off before I think about lunch.
Oatmeal Bar Cookies
Ever since I can remember, the raisin has been my sneaky dessert nemesis. On more than one occasion, little Younger Self bit into what she thought was a perfectly normal chocolate chip cookie, only to be horrified to taste the squidgy, sticky goo of a raisin. (I guess I still do that on occasion; but at least I’m now mature enough to refrain from spitting it out. When anyone’s watching.)
Luckily for my Younger Self, the raisin often came with a helpful marker: the oatmeal. I quickly learned to avoid like the plague any cookie that looked unreasonably bumpy or craggy, and that bit of caution worked beautifully for most of my life.
But then, to both my joy and dismay, the world began slowly producing chocolate chip oatmeal cookies. There was joy because, as I soon discovered, the things are absolutely delightful; they might actually be my favorite cookie. Nutty, chocolaty, and chewy, all in one glorious and golden-brown package. But of course there was also dismay; I was no longer able to rely fully on the old warning that had been so simple. Oatmeal cookies no longer equal raisin cookies; sometimes, they equal something I really want to eat.
I now must poke and prod and examine an oatmeal cookie very closely to determine the level of safety. It’s just unfair to get a girl’s hopes up, only to dash them with the realization that those dark bits are raisins. Disappointment from a cookie is the worst kind.
You can see, then, why I was just about to pass over a recent Cookie of the Day from Martha Stewart: they were called Oatmeal-Raisin Bars. But the photo caught my eye. I am a bit of a sucker for bar cookies in general (you can cut them into any shape or size you want!), and those. Looked. Awesome.
What’s more, the recipe looked about as simple as breathing. No waiting for butter to soften, no creaming, no portioning individual scoops of dough. Just melt butter, whisk with wet ingredients, mix in dry ingredients. Bake. Cut. Eat. Repeat. They were right up my alley, aside from those damned raisins.
As easy as they looked, and considering that I had all the necessary ingredients on hand, I decided to give them a try (swapping the raisins for chocolate chips, of course). The smell from the oven while they baked was fantastic; the butter and brown sugar mingled into an almost butterscotch scent, while the toasting oatmeal came through warm and cheerful.
I may have let them bake a minute or so too long; I think I would prefer these with a slightly under-done center. But really, I’m just being picky; these are an excellent oatmeal cookie, pleasingly firm and easy to cut. The oats soften into an appropriately chewy texture, which I was initially a little concerned that they might not do, due to the relatively high percentage of them in the batter. The oats also provide a sort of ersatz “flaky layer” effect and texture, which is quite pretty. A touch of cinnamon and vanilla deepen the flavors, and play quite nicely with the chocolate. A splash or two of Bourbon would not have been out of place, but I restrained myself this time.
I guess if you insist on using raisins, and no one around you finds them objectionable, they’d probably go quite well. I did briefly consider using currants or dried cherries instead, and once this batch is gone (and those buckeyes, curse you for being so tasty), I may have a go at that. They couldn’t possibly be simpler to make, and I can almost guarantee acclaim if you bring a plateful along to anywhere.
And for the record, I have nothing personal against raisins; I just have never really enjoyed eating them. We have an understanding: as long as they stay in their little red box, and I don’t put them in my shopping cart, we do just fine.
Adapted from Martha Stewart Everyday Food
Ingredients
- 3/4 cup (1 1/2 sticks) unsalted butter, melted and cooled slightly, plus extra
- 3/4 cup packed light brown sugar
- 1/4 cup granulated sugar
- 3/4 teaspoon salt
- 1/2 teaspoon ground cinnamon
- 1 large egg
- 1 teaspoon vanilla extract
- 1 cup (4 1/2 ounces) unbleached all-purpose flour
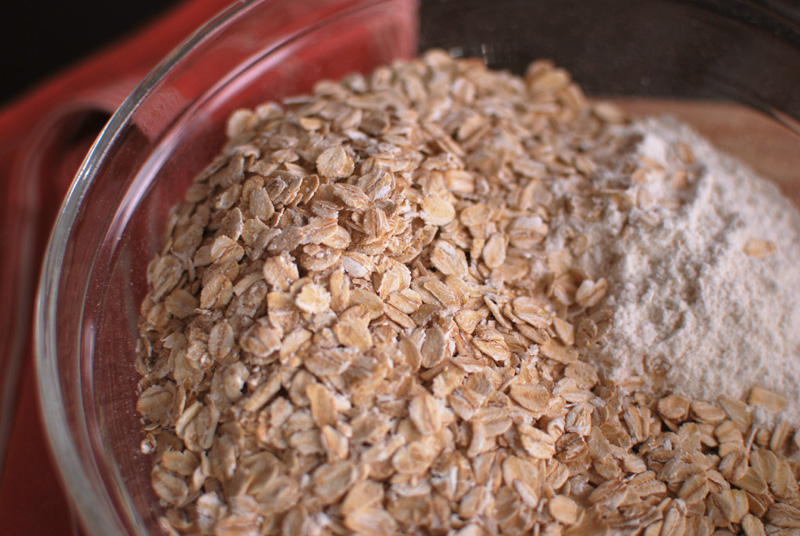
- 2 cups (7 ounces) old-fashioned rolled oats (not quick-cooking)
- 1 cup (6 ounces) chocolate chips
Instructions
1. Preheat oven to 350º F. Butter an 8 inch square baking pan thoroughly, and line the bottom with parchment paper, leaving an overhang on two sides. Butter the parchment as well.
2. In a large bowl, whisk together the butter, sugars, salt, cinnamon, egg, and vanilla until smooth. Add the flour, oats, and chocolate chips. Gently fold together until just combined.
3. Spread the batter in the prepared pan, smoothing the top. Bake at 350º F until golden brown, 25 to 30 minutes. Cool completely in the pan, at least 1 hour. Using the paper overhang, lift onto a cutting board and divide into 16 bars.
https://onehundredeggs.com/oatmeal-bar-cookies/Valentine’s Day For Overachievers
I know it’s come and gone, but I didn’t forget about Valentine’s Day; I just haven’t gotten my thoughts together about this before now. I hope you will forgive me.
Let’s say, for the sake of hypothesis, that you’re a culinary school graduate. Let’s also say that you have a perfectionist streak about a mile wide, and a moderately overachieving nature that infuses you with the urge to constantly trump your own culinary efforts. Lastly, let’s say you’re unemployed. With aaaaaaall the time in the world.
With that framework in mind – all purely hypothetical, of course – you might better understand the dinner that I presented to my sweetheart this last Valentine’s Day. Yes, I’m fully aware that normal people do not cook like this. Ahem.
The inspiration for the whole menu began with a most unusual ice cream recipe. If there’s one word for the type of food that can win over my sweetheart, it’s “unusual”. That, combined with his love of desserts and sweets in general, meant that when I saw a recipe for a pretty gray (yes, gray!) ice cream made with soft European licorice candy, I had to serve it.
I find unusual ice creams, like this one, are a bit… well, strange if served alone, even boring. But pair that anise-scented licorice ice cream with cumin, lemon, clove, cardamom, and ginger, and now you’ve got something interesting going on.
Armed with those flavors and little else, I solicited drink pairing recommendations from my new favorite spirits boutique. The immediate and unhesitant suggestion – a rare and spiced Italian beer – may have scared some off, but I knew my ale-loving sweetheart would surely appreciate it, especially if it paired as well as the shopkeeper insinuated it would. The large bottle (750 mL) meant that this beer would have to pair with the entrée as well, if either of us wanted to be at all useful the next day.
The amber ale, flavored with “anise, pepper, tandori [sic], and curry”, dictated an Indian-spiced dish, and a modest request for seafood narrowed my focus to a manageable level. From there, an appetizer with softer flavors suggested itself; paired with an appropriate cocktail, I had the menu set.
The evening started off gently, with the subtlety of amberjack sashimi lightly dressed with a mignonette-inspired mélange of red grapefruit, cucumber, shallot, and rosé Champagne vinegar. Fried garlic and ginger (giving a nod to the pickled ginger typically served with sushi) provided a contrasting crunch, and were used sparingly enough to not overwhelm the other delicate flavors.
This immodest dish of blushing pink and naked flesh was served with a cocktail that recalled the flavors on the plate, mixing red grapefruit juice with cucumber-infused Hendrick’s gin. Rose water and lime lent a Persian air, beckoning the palate to follow along to the exotic flavors of the entrée. The drink was well-balanced, tending towards sweet, a refreshing counterpoint to the sharp acidity of the topping on the supple fish.
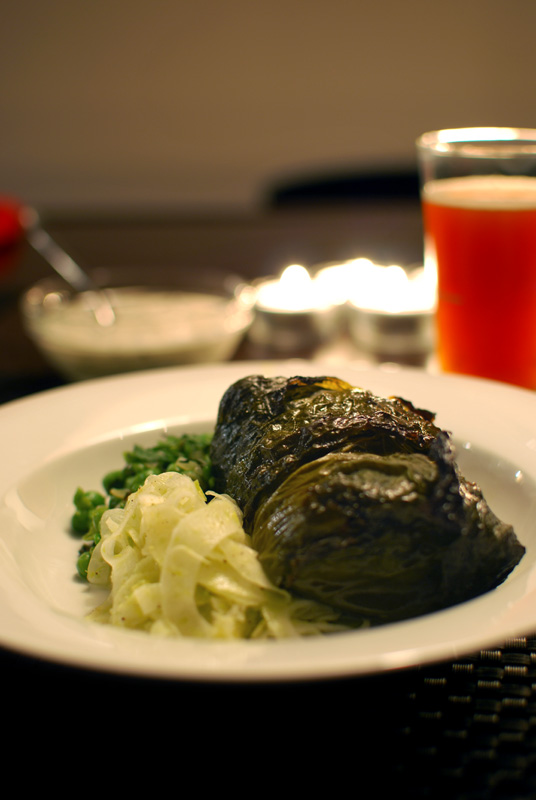
Spices colored the second course, both figuratively and literally. Turmeric and cayenne tinted the ivory of a thick piece of cod with a golden hue, while hints of cumin and black pepper warmed the blood and chased away any chill that crept in from outside the windows. This sunny gem was decorously wrapped with a layer of grape leaves, in modest contrast to the first course. Peeling back the leaves, crisped in the heat of an oven, the provocative scents wafted up as the fish was undressed. A thick raita brought mustard seed, garlic, and lemon along with the creamy tang of yogurt.
On the side, minted smashed peas added a cheeky reference to Britain’s tangled history with India, while brightening the plate with a vibrant green color and flavor. Shaved fennel, lightly tossed with olive oil and lemon juice, gave sharpness and crunch, and offered faint suggestion of the dessert course to follow.
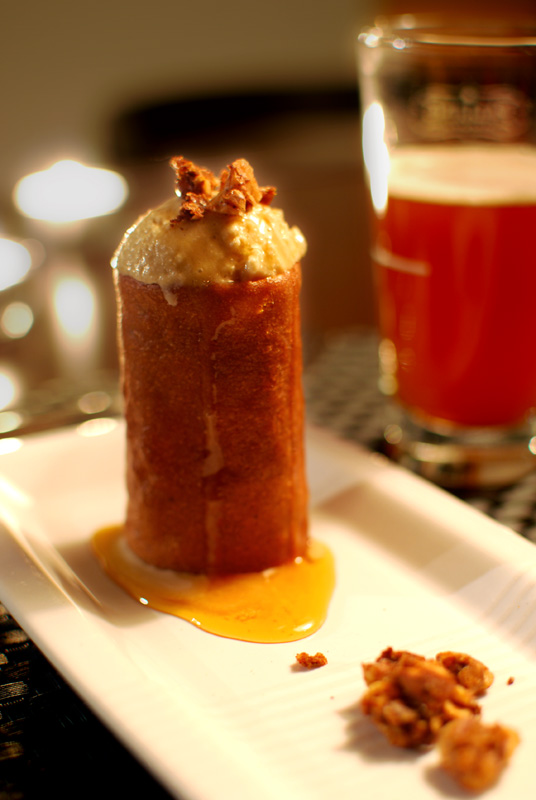
The pièce de résistance, a licorice ice cream parfait, was simple in concept: a tuile cylinder surrounding scoops of ice cream, interlaced with a caramel syrup and toasted nuts. But of course, the flavors weren’t so simple. The ice cream was flavored generously with the aforementioned licorice candy and with Herbsaint (an anise-flavored liquor), while the tuile crunched with lemon zest and the smoke of cumin. The caramel syrup was heady with cardamom, clove, ginger, and pepper; and the earthy almonds and walnuts were coated with bright allspice and a touch of cayenne.
Seemingly so disparate and disjointed, the spices of each different component blended into a seductive unity, each bite drawing a new scent, and a new taste, from the beer. In response, the beer seemed to highlight each spice in the soft ice cream, in the snap of the tuile, in the sleek caramel. The pairing was spot-on, and there’s no wine or cocktail that could possibly have been any better.
Valentine’s Day has at its heart a very sweet sentiment, despite the rampant commercialization that cheapens it: it’s a day to pay extra attention to your special Valentine. Personally, I relish any opportunity to cook a special occasion dinner; so I take what I like from Valentine’s Day, and leave the saccharine store-bought sentiments behind. There is no greater romance to me than a well-planned and well-executed meal, even more so if it’s specifically tailored to particular tastes.
This meal was a gift both from and to myself. I dreamed it up and cooked it, true; but I also got to eat and enjoy it as well. As much work as such a dinner entails, I find every minute is more than worth it when, at the end of the day, you look across a candle-lit table to see eyes that taste what you taste, and drink what you drink, and you both find it to be breathtakingly good.
***********
MENU
Amberjack sashimi, red grapefruit and cucumber “mignonette”
Cardamom Rose cocktail
Indian-spiced cod wrapped in grape leaves with raita, minted smashed peas, shaved fennel
Shangrila, Birra Troll
Licorice ice cream parfait, cumin tuile, spiced clear caramel syrup, spiced almonds and walnuts
Shangrila, Birra Troll
***********
Amberjack Sashimi With Red Grapefruit and Cucumber “Mignonette”
Serves 2
The bracing topping on this fish was inspired by a traditional mignonette, a vinegar and pepper sauce typically used on raw oysters. For the vinegar, I used a bottle of rosé Champagne that had gone off, but was too good to throw out; store-bought vinegar will do just as well. You can substitute any mild and firm white fish for the amberjack, depending on what’s fresh at your fishmonger.
Ingredients:
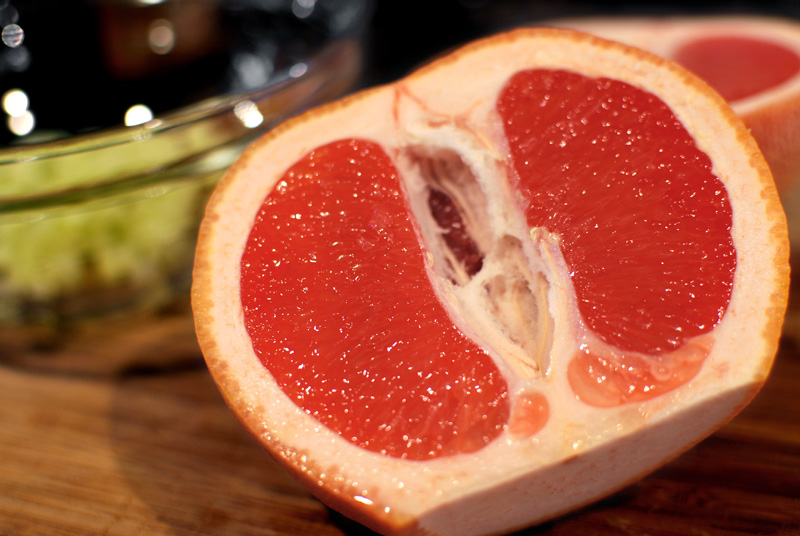
- 1/2 red grapefruit, cut into supremes, and diced
- 1/2 cucumber, peeled and seeded, cut into 1/4 inch cubes
- 1 medium shallot, minced
- 1/2 teaspoon whole white peppercorns, crushed coarsely
- 1/4 cup Champagne vinegar, rosé if possible
- Kosher salt, to taste
- 1/3 cup olive oil, more or less, for frying
- 1 small knob fresh ginger, about 1 x 2 inches in size, peeled and cut into matchsticks
- 1 large clove garlic, peeled and cut into matchsticks
- 6 to 8 sprigs parsley, leaves only
- 4 to 6 ounces amberjack, sliced thinly
Directions:
- 1. In a medium bowl, combine the grapefruit, cucumber, shallot, peppercorns, and Champagne vinegar. Add a pinch of salt, to taste. Cover and refrigerate for at least 30 minutes, or up to several hours.
- 2. Heat the olive oil over medium heat in a small pan until hot but not smoking. Fry the ginger until browned and crisp, about 1 minute. Remove to a paper towel to drain. Fry the garlic in the same oil until browned and crisp, about 30 seconds. Remove to a paper towel to drain. Fry the parsley in the same oil until crisp, about 10 seconds. Remove to a paper towel to drain.
- 3. To serve, arrange the amberjack slices on a plate. Top with the grapefruit-cucumber mixture. Garnish with the fried ginger, garlic, and parsley. Serve immediately, before the acidic dressing begins to “cook” the raw fish.
Cardamom Rose Cocktail
Adapted from Apothecary, via Design Sponge
Makes 2 cocktails
You can find rose water at some specialty liquor stores, spice stores, or at Middle Eastern or Indian groceries. The syrup recipe makes more than you need for one batch, so you can re-create the cocktail several times. You will want to do this.
Ingredients for the rose syrup:
- 1 lime, juiced (about 2 tablespoons juice), peel reserved
- 1 1/4 cups water
- 1 1/2 cups sugar
- 1/4 cup rose water
- 3 cardamom pods, crushed
Ingredients for the cocktail:
- 2 cardamom pods
- 3 ounces Hendrick’s gin
- 1 1/2 ounces rose syrup
- 1 ounce fresh lemon juice
- 1 ounce fresh red grapefruit juice
- 4 dashes bitters
- 2 long strips of grapefruit peel, for garnish
Directions:
- 1. To make the rose syrup, combine all ingredients in a small saucepan, including the lime peel. Heat, stirring, until sugar dissolves. Remove from the heat, and let stand, covered, at least 30 minutes. Strain. Store in the refrigerator until ready to use.
- 2. To make the cocktail, very lightly muddle (crush) the cardamom pods at the bottom of a shaker. Add the remaining ingredients, and add ice. Cover and shake hard. Strain into two glasses. Garnish with the grapefruit peel.
Indian-Spiced Cod Wrapped in Grape Leaves With Raita
Adapted from Megan Moore and David Tanis
Serves 2
Feel free to substitute the cod for whatever similarly thick and mild fish is fresh at your fishmonger. For the raita, if you can’t find the thick Greek-style yogurt, simply drain 1 cup plain yogurt in a paper-towel-lined sieve over a bowl in the refrigerator for about 6 to 8 hours.
Ingredients for the spice rub:
- 2 teaspoons cumin seeds
- 2 teaspoons coriander seeds
- 2 teaspoons fennel seeds
- 1 teaspoon whole black peppercorns
- 1 tablespoon ground turmeric
- 1/2 teaspoon cayenne pepper
- 1/4 teaspoon ground cloves
Ingredients for the fish:
- 8 to 10 large brined grape leaves, rinsed, patted dry, and stems trimmed
- 2 thick cod fillets or steaks, about 6 ounces each, and about 1 inch thick
- 2 tablespoons olive oil, divided
- Salt, to taste
Ingredients for the raita:
- 1 teaspoon olive oil
- 1/2 teaspoon mustard seed
- 1/2 teaspoon cumin seed
- 1 garlic clove, minced
- 1/2 teaspoon minced or grated fresh ginger
- 1/2 small serrano chile, finely minced
- 1/2 cup plain Greek-style yogurt
Directions:
- 1. To make the spice rub, heat the cumin, coriander, fennel, and peppercorns in a dry pan over medium heat until fragrant, 2 to 3 minutes. Transfer to a spice grinder or mortar, and grind finely. Blend with the turmeric, cayenne, and cloves.
- 2. To make the fish, preheat the oven to 400º F, and line a baking sheet with aluminum foil. Lay half the grape leaves out on a work surface, vein-side up, overlapping the leaves to make a solid sheet. Repeat with remaining leaves.
- 3. Drizzle the fish evenly with 1 tablespoon of the olive oil, and sprinkle each fillet with 1 to 2 teaspoons of the spice rub. Sprinkle with salt. Rub the spices onto the fish, until entirely coated.

- 4. Place each piece of fish on top of one of the rounds of grape leaves. Wrap the leaves around the fish, and transfer seam-side down to the prepared baking sheet. Drizzle the packets with the remaining olive oil, and gently rub to coat evenly.
- 5. Roast the fish at 400º F for about 20 minutes, or until the grape leaves have crisped and the fish is just cooked through. (If your fish is thinner than 1 inch, it will take less time to cook.)
- 6. While the fish cooks, make the raita. Heat the olive oil in a small frying pan over medium heat. Add the mustard and cumin seeds. When the seeds just begin to pop, add the garlic. Cook for about 10 seconds, not long enough to let the garlic turn brown. Add all the contents of the pan to the yogurt, and stir in the ginger and serrano. Stir to combine, and add a pinch of salt to taste.
- 7. The cooked fish will stand at room temperature for up to 1 hour. When ready to serve, you can either unwrap the fish and top with the raita, or let dinner guests unwrap their own piece, passing the raita at the table.
Minted Smashed Peas
Adapted from Jamie Oliver
Makes 3 or 4 servings
Ingredients:
- 1 tablespoon olive oil
- 1 large or 2 medium shallots, minced
- 1 handful mint, chopped roughly (about 2 tablespoons)
- 8 ounces frozen peas
- 1 pat butter (1 to 2 teaspoons)
- Salt and pepper, to taste
Directions:
- 1. Heat the olive oil over medium-high heat in a medium-sized saucepan. Add the shallot and cook until soft and fragrant, about 3 minutes. Add the mint and peas, and cover. Let steam for 2 to 3 minutes, or until just cooked. Uncover, add the butter, and salt and pepper to taste. Smash with a potato masher, or by smashing against the side of the pan with the back of a spoon. Adjust seasonings if needed, and serve warm.
Shaved Fennel
Makes 2 servings
Ingredients:
- 1/2 bulb fennel
- 1/2 lemon, juiced and zested
- 2 teaspoons olive oil
- Salt and pepper, to taste
Directions:
- 1. Using a mandoline or sharp knife, shave the fennel across the grain into paper-thin slices. Toss with the juice and zest of the lemon half, the olive oil, and salt and pepper.
Licorice Ice Cream Parfait
Inspired by the Praline Parfait served at Commander’s Palace in New Orleans
The following recipes make more than enough for two servings of dessert; but depending on how large the portions are, the serving size can vary widely.
Ingredients:
- Cumin tuile cylinders (recipe below)
- Licorice ice cream (recipe below)
- Spiced clear caramel syrup (recipe below)
- Spiced nuts (recipe below)
Directions:
- 1. Place one tuile cylinder on a plate. Fill with one scoop of licorice ice cream, and top with about 2 teaspoons caramel syrup, and a few spiced nuts. Continue adding ice cream, syrup, and nuts, until the cylinder cannot hold any more. Serve immediately.
Cumin Tuile Cookies
Adapted from The Professional Pastry Chef, by Bo Friberg
Makes about 3/4 cup batter
It is very important to have all ingredients at room temperature with this recipe. If cold, the butter will not cream properly, and cold egg whites will make the butter clump into tiny flakes; both of these outcomes will poorly affect the batter. If all ingredients are at room temperature, this batter is quite easy to make. I recommend using a silicon baking mat (such as a Silpat) to bake these, which eliminates any issues of the cookies sticking, and holds warmth so that the cookies remain pliable for the longest amount of time. If that’s not available, use baking sheets that have been well greased and floured. Additionally, you can shape these cookies without using a template, but a template cut from a sheet of plastic (available at art supply stores) will produce cookies of the most even thickness, which will bake most evenly. I’ve used mat board here, but don’t really recommend it, as I found it a bit too thick, and entirely incapable of being re-used.
Ingredients:
- 1/4 teaspoon whole cumin seed
- 2 ounces (4 tablespoons) unsalted butter, at room temperature
- 2 ounces (1/2 cup, or 56 grams) powdered sugar, sifted
- 1/4 cup egg whites (from 2 large eggs), at room temperature
- 1/4 teaspoon vanilla extract
- 2 ounces (about 1/2 cup) unbleached all-purpose or cake flour
- Zest of 1 small lemon
Directions:
- 1. In a dry pan, toast the cumin over medium heat until fragrant, about 2 minutes. Transfer to a spice grinder or mortar, and grind finely.
- 2. In the bowl of a stand mixer, using the paddle attachment, cream together the butter and powdered sugar at medium to medium-high speed until fluffy, about 2 minutes. Scrape the bowl as needed. Add the egg whites and vanilla, and beat until incorporated.
- 3. Add the flour, lemon zest, and ground toasted cumin. Mix on low speed until just incorporated; do not overmix.
- 4. Store batter, covered, in the refrigerator. Batter will keep for several weeks. Allow to soften slightly after removing it from the refrigerator, then stir until smooth and spreadable before using. Do not let get too warm, as the edges of the tuile will be ragged if the batter is too soft.
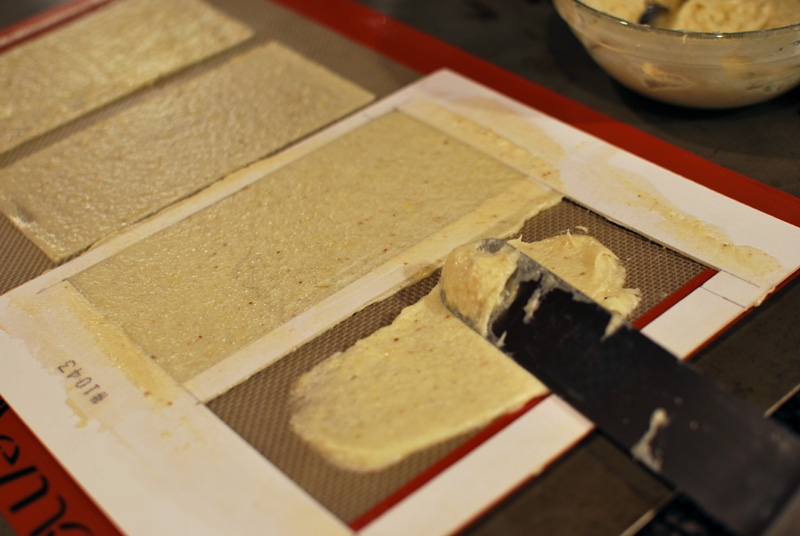
- 5. Preheat oven to 400º F, and line a baking sheet with a silicon mat (such as a Silpat). Using an offset spatula, thinly spread the batter flat and even within a template (directions below), on the mat. Carefully lift the template off, taking care not to disturb the shaped batter.
- 6. Bake the tuile at 400º F until the cookies are evenly and well browned, 5 to 8 minutes. Keep a close eye on them, as they can burn in a moment.
- 7. Leave the pan in the oven, with the door open. Using an offset spatula, remove one cookie at a time, and curl around a small drinking glass (or any other similarly small cylinder), shaping it into a cylinder. This must be done fairly quickly, before the cookies start to cool and become brittle. Repeat with remaining cookies on sheet. If the cookies harden too soon, return to the oven for a moment until pliable again. Let cool. Store in an airtight container at room temperature for up to 3 days.
Note: The template I used was made of mat board, but I suggest a slightly thinner sheet of plastic, which may be rinsed and re-used. Cut out a rectangle about 4 x 8 inches, which will roll up into a cylinder about 4 inches tall and 2 1/2 inches in diameter. I found this a perfect size cylinder to hold the portion of ice cream I wanted to serve. If you like, you can also make tuile bowls, by using a circle template, and shaping the cookies by placing in a bowl while still warm, or draping over the underside of a muffin tin.
Licorice Ice Cream
Adapted from Bake My Day and Aliza Green
Makes about 1 quart
Though my version didn’t turn out as beautifully and purely gray as Bake My Day’s version (the result of including egg yolks for a more traditional ice cream base), it was still a very lovely tan. The Herbsaint liqueur keeps the finished ice cream very soft, even after sitting in the freezer for some time.
Ingredients:
- 6 egg yolks
- 1/2 cup plus 2 tablespoons sugar
- 1 three-fingered pinch salt
- 1 3/4 cup milk
- 1 cup heavy cream
- 30 one-inch soft European-style licorice candies (such as Panda), or about 2 1/2 ounces
- 2 tablespoons Herbsaint, or other anise-flavored liqueur
- 2 teaspoons vanilla extract
Directions:
- 1. Whisk the egg yolks and the sugar together in a large bowl.
- 2. In a nonreactive saucepan, heat the salt, milk, cream, and licorice candy over medium heat, stirring frequently until the candy melts. (There may still be small clumps of licorice; these will get strained out later.) Remove from the heat.
- 3. Add a spoonful or two of the hot milk mixture to the egg yolks, whisking constantly. Gradually temper in more spoonfuls of the hot milk, continuing to whisk to prevent the eggs from cooking. When about half of the milk has been added, you may combine the rest of the two mixtures together. Return to the pan.
- 4. Over medium heat, and stirring gently but constantly, cook the mixture until it reaches 165º F on an instant-read thermometer. Immediately remove from the heat, and strain the mixture through a fine mesh strainer into a medium bowl. If possible, set this bowl in an ice bath to cool rapidly; otherwise, let cool at room temperature. Stir in the Herbsaint and vanilla. When cool, cover and refrigerate for at least 8 hours and up to 2 days. Freeze in an ice cream maker, according to manufacturer’s instructions.
Spiced Clear Caramel Syrup
Makes about 1 cup
As tempting as it is to use flavorful brown sugar here, resist the urge to do so. For caramel, it is necessary to use granulated sugar, which has very few impurities. Brown sugar will simply crystallize into a nasty lump.
Ingredients:
- 8 ounces granulated sugar
- 1/4 teaspoon fresh lemon juice
- 6 tablespoons room-temperature water, divided
- 1 stick cinnamon
- 1 star anise
- 5 cardamom pods
- 20 whole cloves
- 1/2 teaspoon black peppercorns, coarsely crushed
- 1/2 teaspoon fennel seed
- A block of fresh ginger, about 1/2 x 1 x 1 inches in size
Directions:
- 1. In a small saucepan, heat the sugar, lemon juice, and 1 tablespoon water over medium heat, stirring just until the sugar has melted. Immediately refrain from stirring further, though you may swirl the pan to heat evenly as needed (this will prevent unwanted crystallization). Cook until the caramel has turned an amber color, about 5 minutes. Do not leave unattended, as the caramel will change color and burn very quickly.
- 2. Slowly add the remaining water, being very careful, as the caramel will bubble up furiously. Heat, stirring, until all the caramel is dissolved. Add the remaining ingredients, cover, and let stand for at least 1 hour and up to 1 day.
- 3. Strain out the spices, and thin with additional water if needed. Syrup will keep indefinitely in the refrigerator.
Spiced Nuts
Makes 1 cup
Ingredients:
- 1 tablespoon egg white
- 1/2 teaspoon water
- 1 tablespoon brown sugar
- 1 pinch each: salt, ground allspice, cayenne pepper, ground ginger, ground cloves, and ground cinnamon
- 1/2 cup (about 2 ounces) chopped almonds
- 1/2 cup (about 2 ounces) chopped walnuts
Directions:
- 1. Preheat the oven to 250º F. In a bowl, beat the egg white with the water until foamy. Whisk in the brown sugar and spices. Add the chopped nuts, and toss to coat.
- 2. Line a baking sheet with aluminum foil. Spread the nuts out in a single layer on the prepared pan. Bake for 45 to 60 minutes, stirring occasionally, until dried out. Let cool. Store at room temperature in an airtight container.

